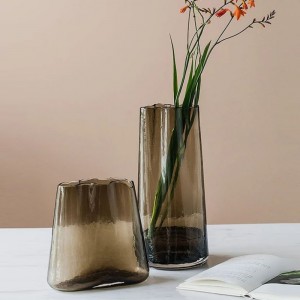
Handmade glass vases are not only functional but also serve as elegant decorative pieces that add charm to any space. Crafting your own glass vase allows you to personalize the design, shape, and color to perfectly suit your taste and home decor. In this article, we will guide you through the step-by-step process of making a beautiful handmade glass vase.
Materials Needed:
Glassblowing pipe or rod
Glassblowing furnace or torch
Glass rods or sheets of desired colors
Glass cutter
Pliers
Heat-resistant gloves
Kiln or annealing oven
Graphite paddle or marver
Water bucket
Safety goggles
Step 1: Preparation Ensure you have a well-ventilated workspace and wear safety goggles and heat-resistant gloves. Prepare your glass rods or sheets by cutting them into smaller, manageable sizes. Clean and organize your tools for easy access.
Step 2: Shaping the Glass Heat the glass rods or sheets using a glassblowing furnace or torch until they become malleable. Use pliers to hold the glass and shape it by rolling it on a graphite paddle or marver. Experiment with different shapes and sizes until you achieve the desired form for your vase.
Step 3: Adding Color To create a visually appealing vase, incorporate colored glass rods or sheets into your design. Heat the colored glass, and while it's soft, roll your clear glass vase over the colored glass to transfer the color onto the surface. Experiment with different color combinations to create unique patterns and effects.
Step 4: Blowing the Vase Using a glassblowing pipe or rod, blow air into the heated glass while continuously rotating it. This process will expand the glass and shape it into a hollow vessel. Continue blowing and shaping until you achieve the desired size and thickness for your vase.
Step 5: Annealing To ensure the strength and durability of your glass vase, it needs to undergo a process called annealing. Place the finished vase in a kiln or annealing oven set at a specific temperature and gradually cool it over several hours. This process eliminates any internal stresses in the glass, making it less prone to breaking.
Step 6: Finishing Touches Once the vase has cooled, you can add final touches like polishing the edges or adding decorative elements such as glass beads or lustrous finishes. Be creative and experiment with various techniques to enhance the overall aesthetic appeal of your handmade glass vase.
Making a handmade glass vase is a rewarding and artistic endeavor. With the right tools, materials, and a little patience, you can create a stunning piece that reflects your personal style and adds a touch of elegance to any setting. So, roll up your sleeves, let your creativity flow, and embark on the exciting journey of crafting your very own handmade glass vase.
Post time: Nov-22-2023


